135 Degree Inside Cove Corner on Corian Solid Surface
Cove inside corners are often a breeze with the correct tooling and a bit of experience. But for most fabricators, we don’t typically get the oddball corners that can stump any of us.
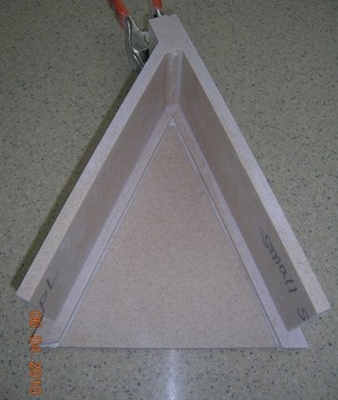
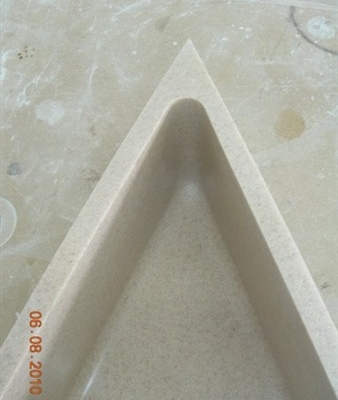
I have created a sample of a 135 degree inside, cove corner using solid surface material. Obviously this is not the only solution so if you have any ideas or input, please add your feedback to the comment section below.
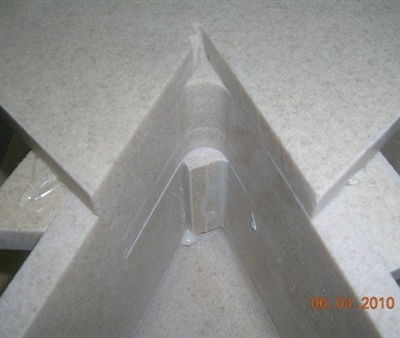
Glue the cove build up stips in place as usual. Then use the countertop to set up and glue your backsplash pieces together. I used a piece of cellophane tape between the top of the cove strip and the splash so that it wouldn’t stick. The cove insert piece at the corner needed to be 7/8″ x 2-1/8″ set into a 1/8″ dado.
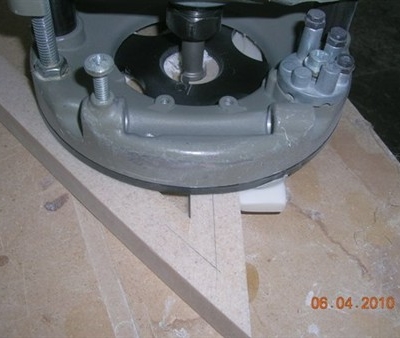
Set up a router with a 3/4″ core box bit. On the base, I have hot melted a guide block that will guage off of the back edge of the counter. It should just leave a flat surface wide enough to glue your verticle splash onto. I have marked the inside limit of the cove cut. Run the router into the corner from both sides, stopping at the lines. Start from about 8 or 9 inches from the corner. This should be far enough away that your Betterly router can get at the rest.
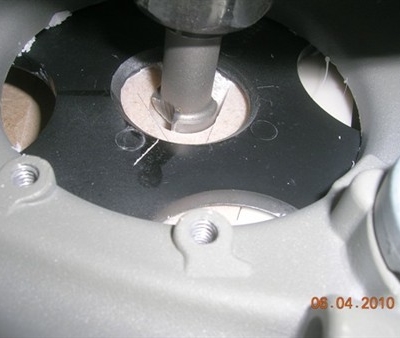
Go into the corner right up to the lines. This should leave a nice smooth corner.
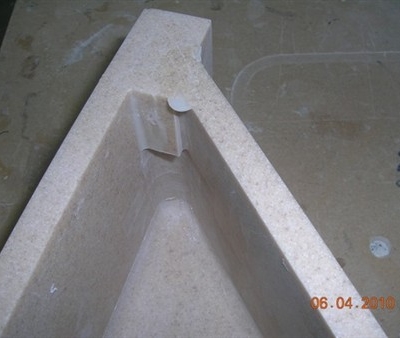
Once you get to this point, I would sand the cove in the area that you can’t get to with your sander. Be careful not to sand the corner off of the cove strip. A scraper makes this fairly easy.
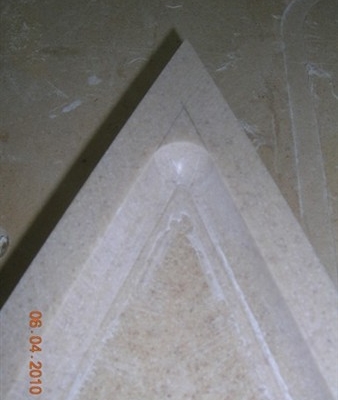
Make a simple jig that you can run a top bearing, flush-trim bit against. I didn’t get it lined up quite right and it left me with a bit of a shoulder.
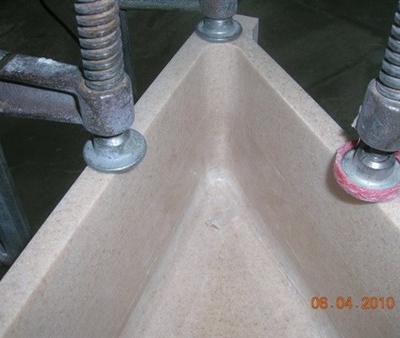
After using the top bearing bit, turn your backsplash assembly over and use a bottom bearing flush trim bit to finish out the corner. The length of your bits will be the limit of how tall you can make the splash. This splash was 4″ including the cove.
After flush trimming, I used a scraper and hand sanding to finish sand the corner. Be careful not to sand too much at the edges or it will change how it fits on the countertop.
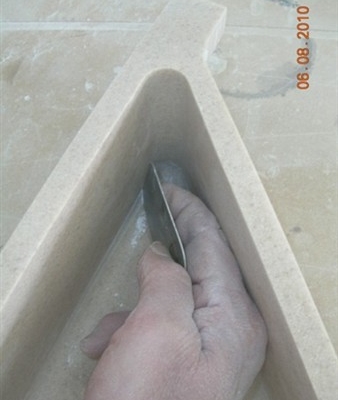
Before gluing the splash to the countertop I applied cellophane tape right up to the edges of the splash and the cove. This allowed me to wipe out most of the squeeze-out. When the glue had cured, I removed the tape leaving just a slight glue line to scrape and sand away.
I wouldn’t want to do 20 tops with 2 corners each. You would probably develop tendonitis in your hands. I would estimate that doing this one example took between 45 to 60 minutes (not counting glue curing time).
All Finished.
About the Author: John Christensen is a long-time solid surface fabricator, repair specialist and owner of Solid Surface Technologies in Springfield, Oregon.
PHOTO COURTESY: JOHN CHRISTENSEN of SOLID SURFACE TECHNOLOGIES