Using Google Documents Spreadsheets for Inventory Tracking – Part 1
For the past several years, my employer, Henry H. Ross & Son, Inc., has been using several Microsoft Access databases for keeping track of inventory. This has worked well but has only been available to those with Microsoft Access on their computers.
Recently, I found out about Google Documents. It isn’t as powerful in some aspects as Microsoft Office, but, being web-based, it is more accessible. It can also communicate with Google Calendar and other Google applications and is able to be viewed and edited on several smartphones and the iPad.
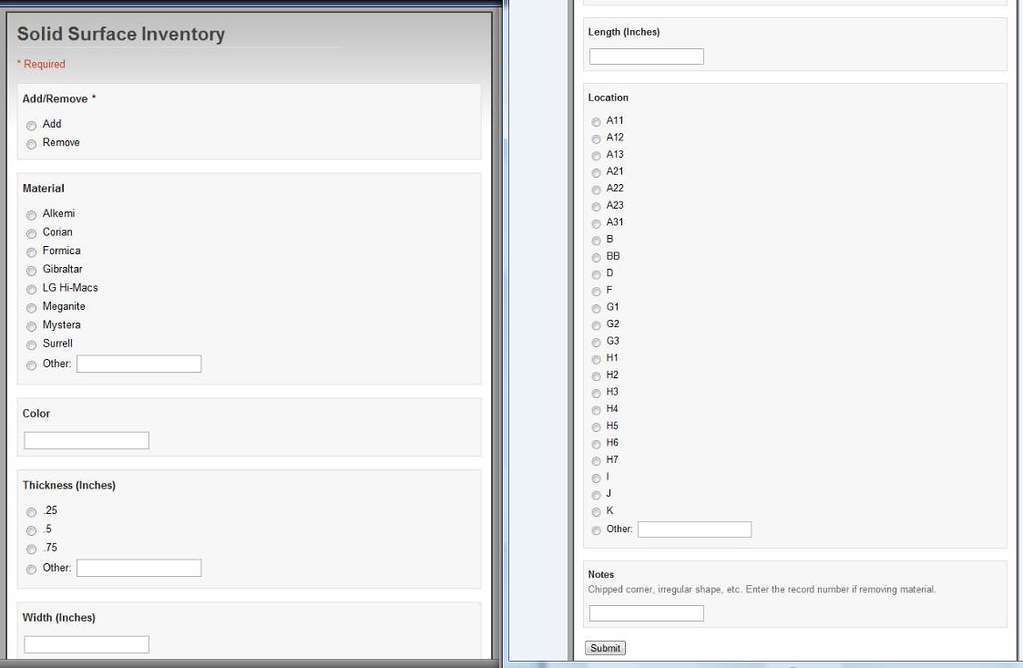
I have been working on a couple of Google Spreadsheets for tracking our inventory. Entries are added or deleted through a form (See Figure 1). Note that form and spreadsheet (see Figure 2) are copies, so you can add/remove entries to see how they work.
Figure 1. Click here to go to the actual form.
Click here to go to the actual spreadsheet, as shown in Figure 2. You can open the form and spreadsheet in adjacent windows to see how quickly the form updates the spreadsheet and also what is going on when a new entry is added. (Please go to File->Make a Copy if you are going to experiment with editing the spreadsheet, so I can maintain the structure of the existing spreadsheet.)
There is a lot of code that goes into cells on the spreadsheet and into the script file, so it is best to only add/remove entries through the form instead of editing the actual spreadsheet. I have this spreadsheet set up so anyone with the link can view/edit. When not making your spreadsheet public, Google lets you pick which people you want to have access to the spreadsheet. They must have a Gmail address. You can select to only let them view the spreadsheet, or allow them to edit also. It is best not to give out the address for the form to those you don’t trust with it. The form is accessible to anyone with the link.
The form can easily be changed to have other selections listed. You can also set it up to only show text boxes, as shown under the Color selection.
The information you see below in Figure 2 is what has been submitted from the form. The column labeled “Timestamp” comes into the spreadsheet as a date and time but is edited through the script file to automatically create a unique record number for each entry where Add has been selected under Add/Remove. This unique record number is critical in deleting entries. To do so, you select Remove in the Add/Remove multiple-choice selection on the form, shown in Figure 1. Then you enter a record number, shown in Figure 3, into the Notes textbox, shown in Figure 1. This compares your entry from the Notes textbox to the values in Column A, shown in Figure 2. If your entry matches any of these values, it is deleted, along with the entry that it matched.
When you select Add, the spreadsheet adds a new entry, gives it a unique record number, and then sorts the spreadsheet by Material, Color, and so on.
Figure 2.
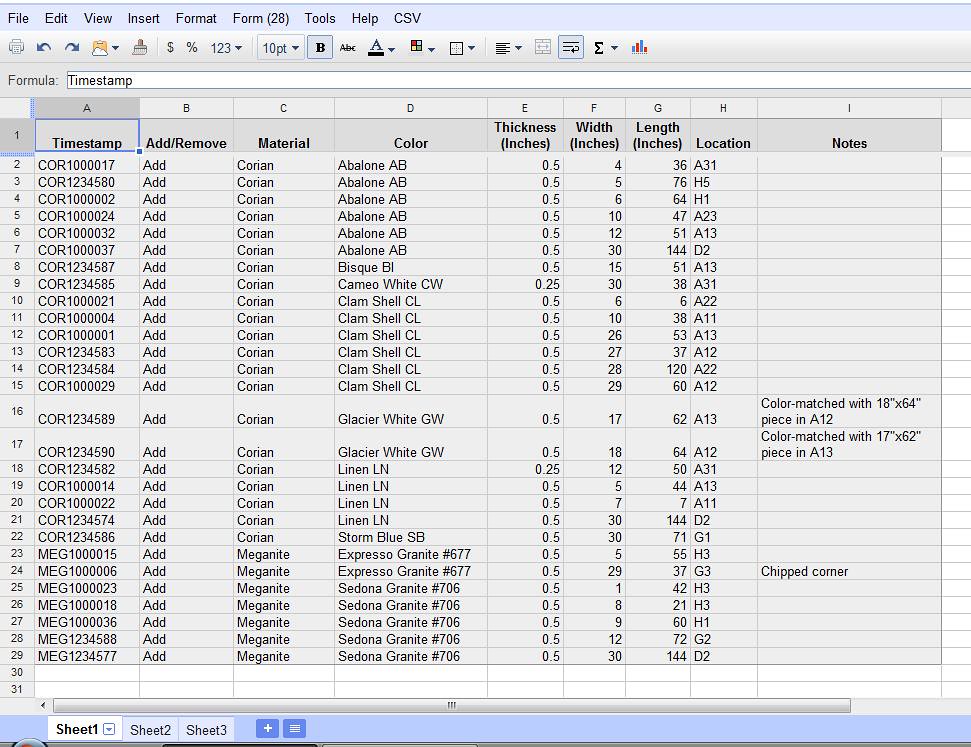
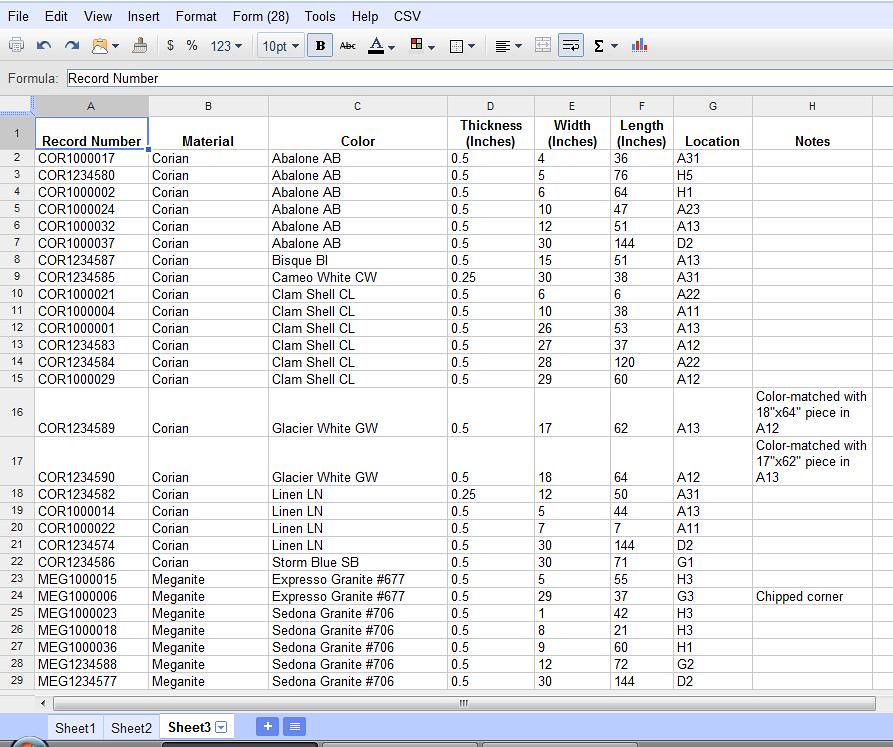
Some of the information that you see above in Figure 2 is not necessary to be viewed, but it is necessary for making the spreadsheet and form communicate with one another. On Sheet3, as shown in Figure 3 below, you see the information that is important to view (at least that is what we use for tracking inventory).
Figure 3.
From the File menu, you can save your spreadsheet in HTML, Excel, PDF, etc. format. It is also possible to link data from this spreadsheet to another spreadsheet.
In Using Google Documents Spreadsheets for Inventory Tracking – Part 2, I will show how to edit the script file to add other prefixes to the record numbers, along with several other things. I am just starting to learn about using Google Documents, so please feel free to suggest any improvements.
About the Author: Seth Emery has been a CAD Drafter/CNC Programmer for Henry H. Ross & Son, Inc. in Lititz, Pennsylvania since 2004. H.H. Ross specializes in the fabrication and installation of solid surface, granite, and engineered stone countertops in residential and commercial applications. Seth can be reached at seth77@ptd.net. Visit the H.H. Ross website at http://www.hhross.com.
PHOTO COURTESY: HH ROSS